GardenSeeker.Co.Uk Pruning Businesses Search Gardening Gifts

How to Level your Garden

Levelling is of particular importance for the construction of patios and lawns. Assess the area to be levelled carefully in order to minimise the amount of soil to be moved during levelling. If a garden has considerable variations in level it may be more realistic to work with the contours, constructing walls, terraces, sunken gardens and or water features. There are many instances where it may be necessary to level your garden.

Choose your level; one which will not entail too much removal or addition of soil, and knock in a master marker peg. Using a level board, (a straight plank approximately 2m long and 2cm thick,) knock in other pegs level with the master peg, by placing the level board on the master peg and the new peg and aligning with a spirit-level on top of the level board.


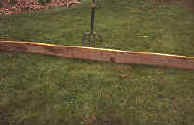
Work across the site carefully tapping in level pegs, and avoiding tripping over them! Soil can then be removed or added until appropriate level achieved.

For very uneven ground, use of 'boning rods', ('T'-shaped markers approx 1m tall with a cross-piece of 45cm.) These are usually used in threes, in conjunction with marker pegs. Site the first master peg on the highest part of the plot. Site the next peg 0.5m away, checking the level with level board and spirit-level.

Place one boning rod upright on the first marker peg, and the second boning rod on the second marker peg. 'Sight' across the 'T' pieces of these two to a further boning rod in the distance, and knock in a marker peg to the correct level. This method is useful in that it can work over undulating ground, plants and rubble to give a useful first levelling. Subsequent levelling should proceed using a level board and spirit-level.

Another way to quickly (!) find out the difference of level in two points, entails 2 people - the kids will love it - a length of hose-pipe, a funnel and some water.

Method... The person with the end of the hose that has the funnel in it, stands at the highest point of the area to be assessed. The height of the funnel from the ground is noted, and should remain constant. (It may be a good idea to fasten the hose/funnel on to a stake driven into the ground.)

The other end of the hose is taken to various positions where you require to know the difference in levels. Water is poured into the hose - slowly via the funnel. The 'free' end of the hose is raised until water no longer seeps out. Measure how high off the ground the hose needs to be to reach this state of equilibrium, and deduct the height of the funnel (top) from the ground. This is the difference in levels.

Example.. If the top of the funnel is 60cm off the ground, and the hose full of water has to be raised 125cm from the lower ground level, then 125cm minus 60cm gives you the answer of 65cm. This is the difference between the ground level at point 'a' - where the funnel is and point 'b' where the other end is.

To get point 'b' to the same level as point 'a', it will require to be 'built up' by 65cm. For absolute accuracy, you must ensure that the funnel end is full to the rim.

This system is particularly good for sorting out levels over fair distances - providing the hose is long enough.

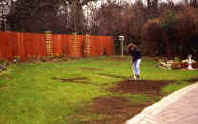
Never, Never, assume that a plot is level, "because it looks it". Take the steps above to ensure that you have a good level garden, patio or lawn.

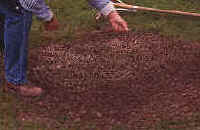
Where soil levels require altering it is preferable to remove the topsoil and save it for later use, rather than to bury it and end up with poorer soil on top. If hollows are to be filled in with soil, consolidate (tread down) regularly to prevent subsequent sinking.

Repairing Bumps In Your Lawn

Repairing Bumps In Your Lawn

Ok! Let's get one thing right, straight away. You do not get a level lawn by using a roller. Using a roller, simply gives you hard bumps and hard hollows - and all the bits in between.

In fact, unless you are going to carry out all of the other operations necessary for a first class lawn, you can get rid of the roller altogether - although I might concede that it is useful for a light run over before the first cut after the winter.

In actual fact, a lawn rarely if ever, 'grows' a bump! There are no logical reasons for a lawn to rise up in places to provide you with a bump! What generally (always) happens, is that the lawn sinks over time - sometimes taking a few weeks as is the case with new lawns, or sometimes over a period of several years, as soil naturally sinks in places as a result of natural earth movement (rare) and underground roots and organic matter decomposing.

Most lawn bumps and hollows are cause by natural soil settlement or erosion over years in the case of mature lawns, and over just a few weeks with a badly prepared surface for new lawns.

Animal Activity on Lawns

Sinking of the lawn can also be as a result of animal actions - not least moles or even ants burrowing under the lawn. In both cases, soil is removed. As in the case of moles, the soil is burrowed away to make tunnels, and deposited on the surface in the form of molehills. In the case of ants - to a lesser extent, the soil is bought up to the surface to form ant hills - thereby making room for the ants nest underground.

Natural Settlement of Lawns

New Lawns

  • More often than not, there is not enough care taken with the soil base preparation before seeding or turfing a new lawn. Rarely is the compacting carried out properly, so this results in the lawn becoming uneven - sometimes in a matter of a few weeks - especially after heavy rain.

Mature and Established Lawns

  • The main cause of unevenness in established lawns, is the natural decaying action that takes place below the soil. Sometimes just a few isolated roots from a dead tree. Sometimes a larger hollow as the result of a tree stump or similar being buried below the soil. It rots away over time, and soil sinks to take its place - lowering the turf in places at the same time.
  • Another cause, is where drainage ditches or similar have been dug out and the infill not compacted properly. Or even waterways finding a new route, and then washing away soil - again resulting in sinking and uneven surface above.

Usually however, it is simply an 'uneven' lawn that is the problem; so take the easy way out, and bring the hollows up to the level of the bumps.

Result = Even Lawn!

(For small hollows - which materialise as 'large bumps', simply carry out the last stages of the article on 'Top Dressing Lawns'.)

As you can see here, the lawn has 'hollows' of about 2 inches (remember them?) deep. (50mm). If you are a lateral thinker, then I suppose you could say that the lawn has 'bumps' which are 2 inches high! As we are dealing with hollows; it has 'hollows' and not bumps. It is much easier to view the hollow and bumps in the lawn by the use of such a straight edge. Sometimes a length of batten will be enough to determine the depth of the hollows.

How to Level Your Lawn - Our Step by Step Guide

Preparation

Leveling Lawn Tips

Judge and estimate how much Top Dressing Mix you are likely to need by running your straight edge length of timber over your lawn, this will show the gaps under the timber.

Prepare a Top Dressing Mix, I use equal parts of sifted top-soil, sharp sand and peat.

Mix well with a garden spade ideally in a wheel barrow.


Filling in the Hollows

Leveling Lawn Tips

Apply the top dressing mix to the area, gently rake, filling in the hollows. Now we need a decent straight edge length of timber. (4x1in (100x 25mm) will be suitable - as is used in the picture. Use the straight edge to spread the top-dressing mix to a rough level by screeding the straight edge back and forth.


Compact the Soil

Leveling Lawn Tips

Once level, then compact the soil by treading with heels, until firm enough not to leave a foot imprint! Do this when the top dressing and soil underneath is dry and not soaked - as is sometimes the case with hollows. (If you do it on sodden soils, then you will need to read about 'compaction' in the lawn aeration article!)


Lightly Rake Level

Leveling Lawn Tips

Once the top dressing has firmed down, you will probably need to add a little bit more in stages until you get the top dressed hollow up to the level of the high spots. Rake to final level with as wide a rake as possible. Finish off the raking using the back of the rake as a screed tool. This should give you a good firm level surface on which you can apply your grass seed mix.


Scatter the Grass Seed

Leveling Lawn Tips

Spread the desired mix of seed at a rate of approx. 'a good handful per square yard'. Really scatter it about to ensure an even spread. Try to get the same type of seed mix as your existing lawn. Basically a 'normal' lawn will consist of Rye and meadow grasses. A fine lawn will normally consist of fescues, browntops and creeping meadow grasses. Don't be over worried - simply opt for a 'general mix' or a 'fine lawn' mix. Even if you can get the mixture absolutely right - highly unlikely - the newly dressed areas will take on a different appearance to the established lawn. After a year or so, it will all be virtually the same, for your normal maintenance schedule will have a large bearing upon how the lawn ends up.


Rake and Protect with Netting

Leveling Lawn Tips

Rake in lightly; protect with netting against birds; water when dry; and be patient for about 2 weeks. Hey presto, the grass starts to grow, and you now have a lawn that is (should be) more level than it was.


Final Step

Leveling Lawn Tips

Care for your New Lawn - New lawns are like babies. They need more care and attention during the first few months and years of life. Many lawn fail because of lack of care in the first few days, weeks or months. New lawns take time to become established. Turfed lawns - whilst they look instant - are not much different to seeded lawns in that respect.

Watering, careful cutting, sparse feeding, and leave off with the lawn weedkiller for the first year or so. Give the lawn time to become established before inhabiting it with garden furniture, play pools and play equipment.


extraAdvert


Popular Gardening Sections

Card image cap
Sections

Learn - all aspects of lawn maintenance, how to build and maintain a pond, care and grow vegetables and fruit, fit for your table.

Sections
Card image cap
Problems

Identify Weeds in The Garden - How to deal with weeds. Diseases and Pest which harm your garden and plants, learn how to prevent, deter and erradicate your garden problems.

Garden Problems
Card image cap
Pruning

Pruning Guide. Shrubs flower better with correct pruning. Many illustrations and examples of what to do - and when. Includes evergreens, roses, flowering shrubs, spring flowering shrubs and pruning for stem effect. This is our most viewed and comprehensive section,

Pruning
Card image cap
Gardening Businesses

Gardening Businesses listed in the UK counties and USA states. County and State Listings of businesses involved in Garden supplies and services. If you wish to be added to the Directory, please send us your information. Having problems, use the search box

Businesses
Card image cap
Gardening

In this section you will learn about Gardening Basics, Containers, Landscaping, Propagation and Soil.

Gardening

Copyright © GardenSeeker.Co.UK - 2000 - 2021

Advertising listing / Privacy Policy
Contact Us

| DMCA.com Protection Status